NetVizor Installation
Learn how to install NetVizor in 10 easy steps!
Once you have made your purchase of NetVizor, you may need assistance installing NetVizor on your network. We recommend using these instructions on any corporate network that has 100 or less computers in total that need to be monitored. If you need to install NetVizor on a network with 101+ computers, you may want to contact us and use our startup script paired with a network shared drive to speed up the process.
Step 1
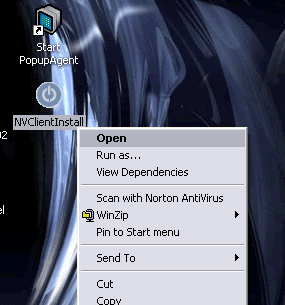
Your first step is to copy the NVClientInstall.exe file to a PC you want to start monitoring. Once you have the file on the PC - double click the NVClientInstall.exe icon to start the install (or right click on it - then select Open).
NOTE: After install is complete you can delete this file!
Step 2
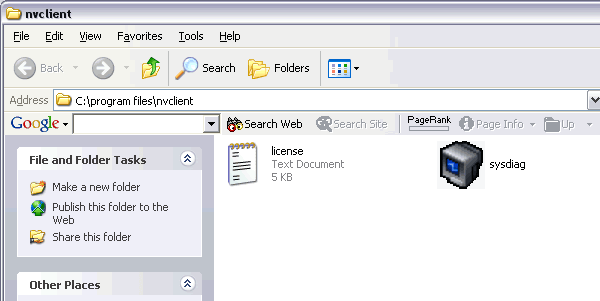
The installation for NetVizor will only take a few seconds - and installs in total stealth - preconfigured - and will start monitoring the PC immediately. The client is installed in nvclient program files folder (as pictured below).
Step 3
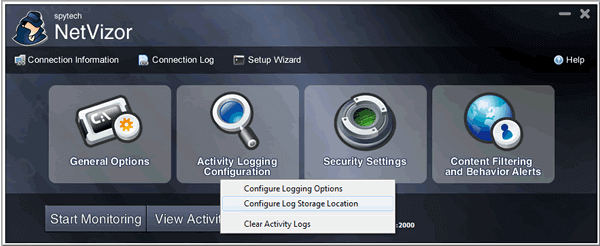
The NetVizor client is already configured to monitor the PC optimally. However, as a network admin, you may want to enable log storage on a server folder so you can monitor network users from a central location without clients being online/active. To do so access the NetVizor client by pressing CONTROL+ALT+SHIFT+M, then entering your password.
When you have the NetVizor window open you will want to click on Activity Logging -> Configure Log Storage Location.
Step 4
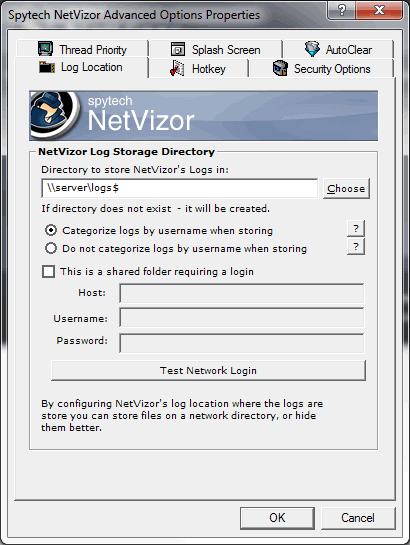
You will need to enter a centralized shared folder that all PC's on your network have read/write access to. This is where each PC's logs will be stored.
We recommend naming the shared folder 'logs$' - or a name that ends with a '$' - the $ indicates the folder is hidden on the network - so users will not be able to browse/view it. We also recommend choosing the 'Categorize logs' feature so that the Viewer views this computer's logs categorized by username. If you choose to not categorize logs you will still be able to view logs for this computer via the NetVizor viewer's interface, but all logs will contain activities for all users on that computer, as opposed to sorting them by username.
Once you have a shared folder setup, and entered into NetVizor, click OK to save. You will be prompted to restart NetVizor. You can run it from the program files\nvclient\sysdiag.exe location mentioned previously in this install guide, or you can reboot the computer.
The client is now installed and configured.
Step 5
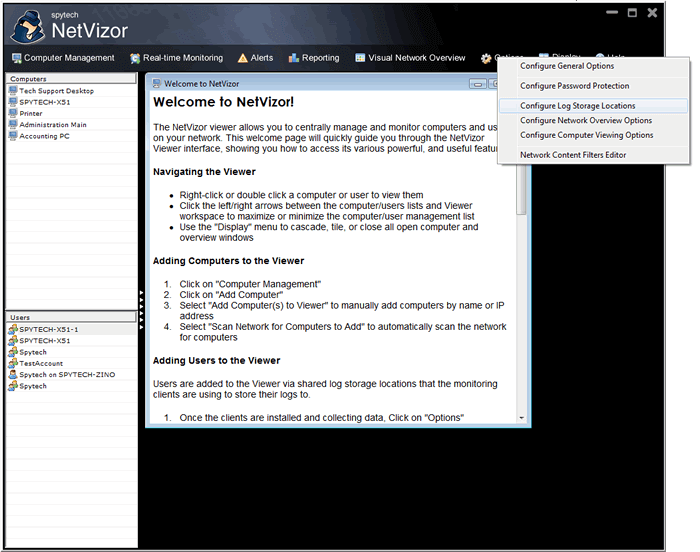
Now that the NetVizor client is configured properly now you will have to setup the viewer (NVViewerInstall.exe) for centralized network viewing. NetVizor will ask you if you want to automatically scan your network for computers to add to the viewer, but you have to configure the viewer to 'see' the shared log storage folder you are storing logs to.
Click on "Configure Log Storage Locations" in the "Options" menu to start the configuration.
Step 6
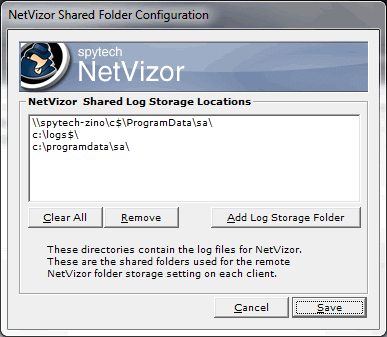
This folder is the same folder you configured for the NetVizor client's you previously configured. If the viewer is installed on the PC with the shared folder that is being used for storage then you can use the local path - as shown below. Otherwise you can use the same shared path you used for all of the clients you previously installed. Notice that you can add more than one storage location to this list - this way you can view multiple share locations from multiple subnets and servers.
Once you set the folder location click Save to proceed.
Step 7
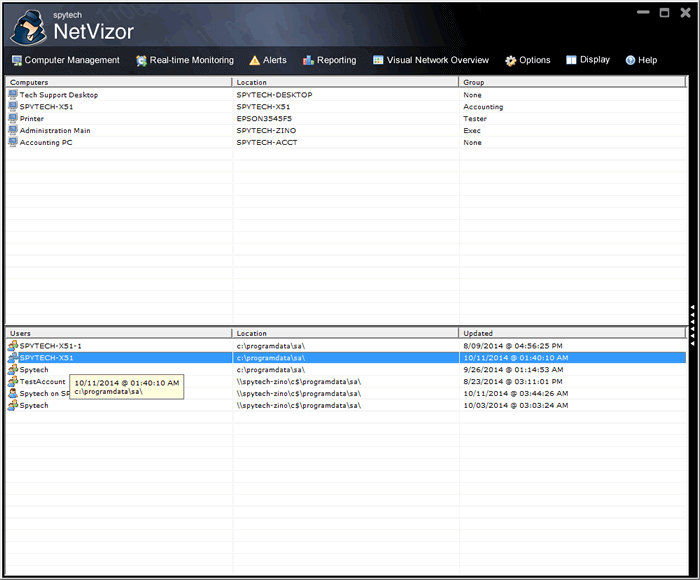
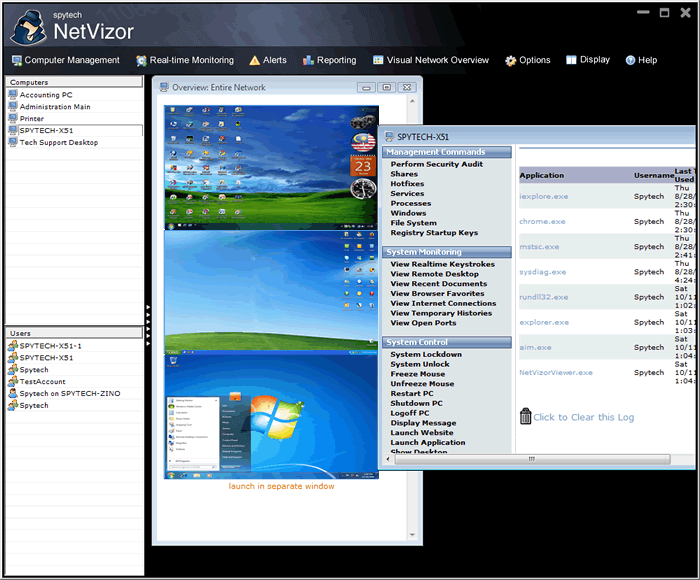
After saving your log locations the Viewer will automatically refresh - this should show all the network users that are being logged by the clients that you installed - as well as PC's on your network.
Step 8
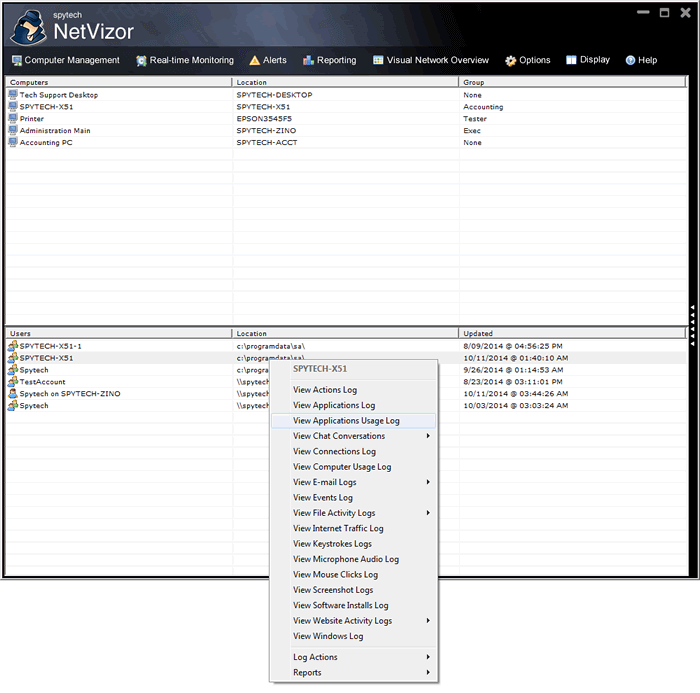
To view a User's activities right-click on a username. You will be presented with a menu to select what activities you wish to view for the remote user.
Step 9
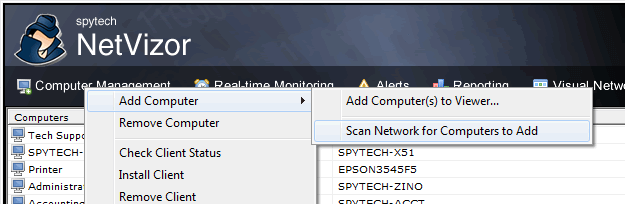
If you need to add additional computers to the NetVizor viewer at any time you can add these computers to the NetVizor viewer by clicking on "Add Computer" within the viewer's "Computer Management" menu.
Step 10
That's it! NetVizor should be ready to go for optimal network surveillance! To remotely connect to remote workstations double-click or right-click on a computer. Use the Real-time Monitoring and Visual Network Overview features to view network usage in real-time, and use the Reports menu to create detailed reports detailing computer usage on your network.
FIf you have any questions check out the main NetVizor site.
Have any questions? Please contact us here.
Support Center
Is your question not answered here? Not a problem! Simply use the contact link below to ask us your question(s).